The process of transferring files from Calyx Point uses the WebDesk Extractor utility. Please see ‘Installing the WebDesk Extractor Utility’ for steps to install the utility before proceeding. Once that is done, use these steps to transfer the data from Point:
1. Open the WebDesk Extractor
icon on your local Desktop.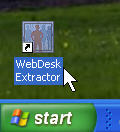
2. Click the ‘Read Data From’ field, and select the Point folder you want to transfer files from.
· Note: Each
Point folder is listed twice; once for Borrowers and once for Prospects. Be sure
to select the Borrowers or Prospects copy of the folder based on which of the
two you need to transfer.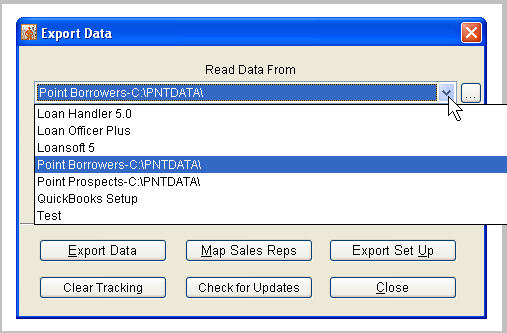
3. Click ‘Export Data’, and
then click Yes to proceed with the transfer. 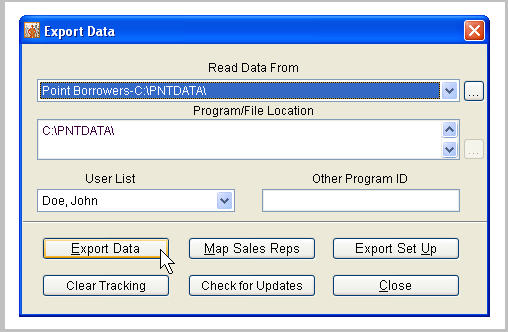

4. When a message appears
indicating that the files are ready for upload, click Ok. Close the WebDesk
Extractor window.
5. Login to the WebDesk with
the option to access local drives enabled. 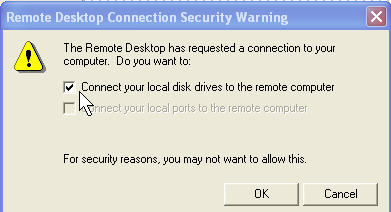
6. Open Mortgage Quest, and
click the Import icon.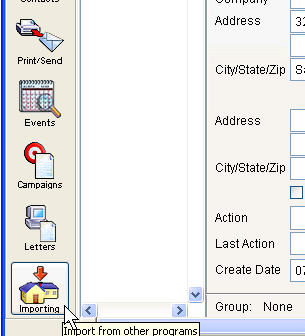
7. Select ‘Point Borrowers’ or
‘Point Prospects’ on the ‘Read Data From’ field. Your selection should be
consistent with what was exported (borrowers vs. prospects).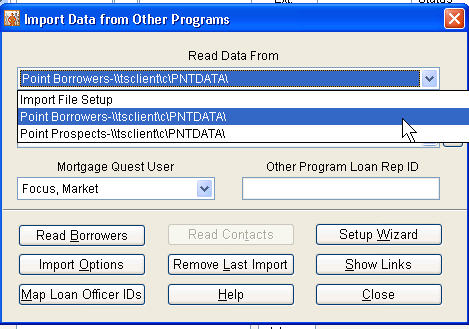
8. If the data folder that was exported from Point contains only the records you want to import, please go to step 9. Otherwise, if the data folder that was exported from Point includes records that belong to loan officers other than the loan officer you want to import, then you will want to map the loan officer IDs to import just the records that belong to the loan officer in Mortgage Quest. In this case follow this procedure to map the loan officer ID:
· Click the ‘Map Loan Officer IDs’ button.
· Use the
screen that appears to match the Mortgage Quest user you want to import the data
for with their loan rep name in Point, and then click Map. If you are importing
for multiple loan officers, be sure to map each loan officer as much as
possible. 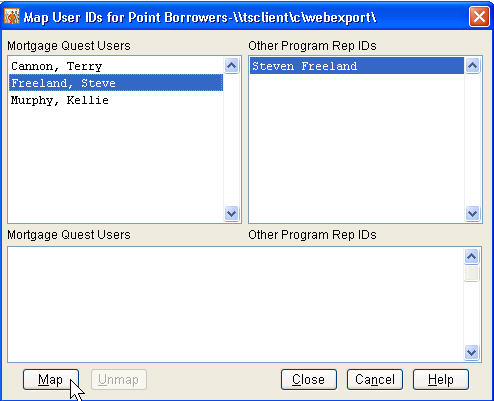
· After mapping
the loan officer IDs, the mapping results should appear at the bottom. Click
Close to return to the import screen.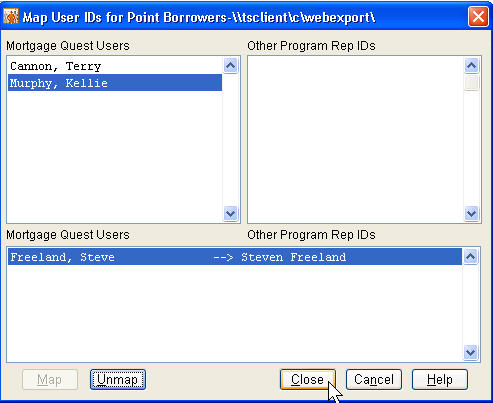
9. Click the ‘Mortgage Quest
User’ field and select the loan officer you want to import data for. If you are
importing data for multiple loan officers, and you were able to create mappings
for each loan officer, select the ‘All Loan Officers’ value instead of an
individual loan officer.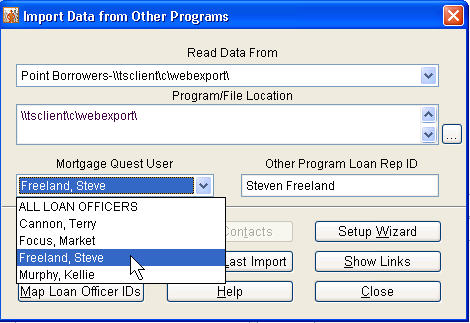
10. Click ‘Read Borrowers’, and then
click Yes to proceed with the import.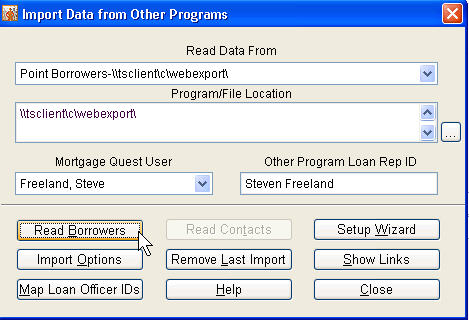

11. Click Yes when prompted to
preview imported records.
12. On the import preview screen that
appears, review the records displayed to verify the correct data is being
imported. Note there is an Action column (on the left) that allows you to
determine if a record is being added to Mortgage Quest or updated. You can
deselect records that you do not want to import. Once you are done reviewing the
data, click Import to complete the import. Note: if you do not want the records
imported, click Cancel.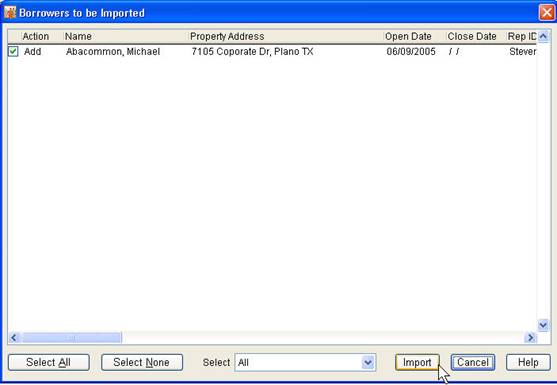
13. Mortgage Quest will complete the
import and indicate how many records were added or updated. You also have the
option to print a report of the import results.
Many of the steps above are
one time steps. For subsequent imports, use these consolidated steps:
· Open the WebDesk Extractor, click ‘Export Data’ and follow the prompts.
· Login to the Webdesk, open Mortgage Quest, and go to the Importing screen.
· Make sure the ‘Read Data From’ and ‘Mortgage Quest User’ fields are set correctly, click ‘Read Borrowers’ and follow the prompts to complete the import.