Follow these steps to setup a remote connection for the WebDesk:
1. Open the Remote Desktop Connection utility by selecting Start \ Al Programs \ Accessories \ Remote Desktop Connection. If the Remote Desktop shortcut is not found, try either of the following:
· On Vista select Start, type in mstsc and press Enter.
· On XP select Start, Run, type in mstsc and press Enter.
2. The Remote Desktop
Connection window appears. In the Computer field type in
webdesk.emarketfocus.com and then click Options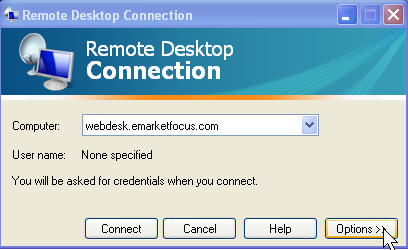
3. In the User name field type
webdesk followed by a backslash and your login ID. For
example, with a login ID of jdoe, you would type webdesk\jdoe. Also, check the
‘Allow me to save credentials’ option.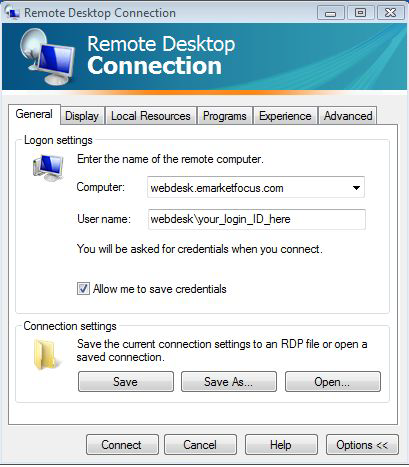
4. Select the Display tab and
choose your desired window size for the WebDesk. The minimum suggested size is
1024x768 and you can select up to full screen size.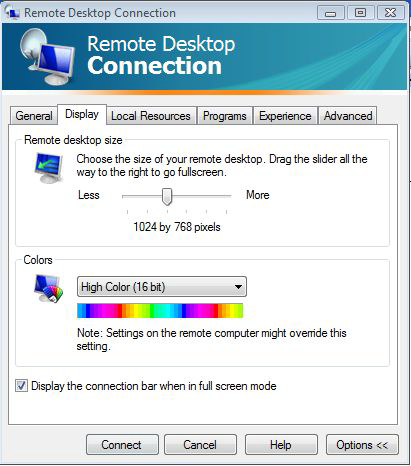
5. Select the Local Resources
tab. Set the Remote computer sound to Do not play. Uncheck the Printers
option. Check the clipboard option (matching the screenshot below).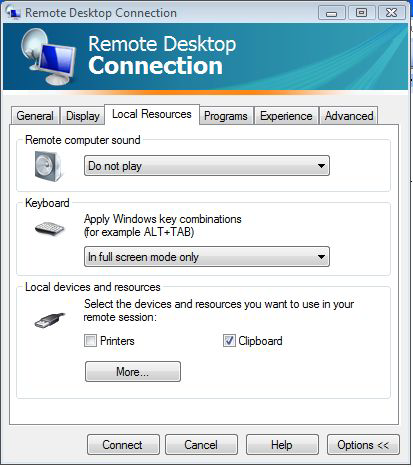
6. Click the More…
button under the Local Resources tab. Click the plus next to the Drives option,
and select the C: drive. The C drive is selected for the purpose of importing
data. If there are other drives you’d like access to from the WebDesk, you may
select them as well. Click OK.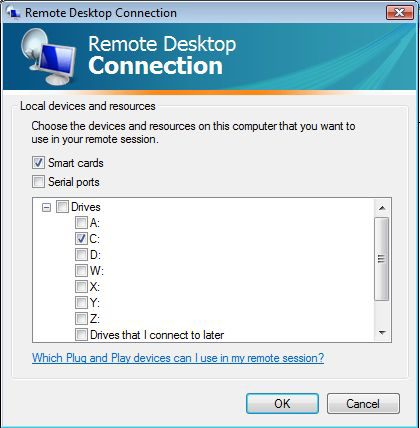
7. Select the Advanced tab. Set
the Server authentication to Connect and don’t warn me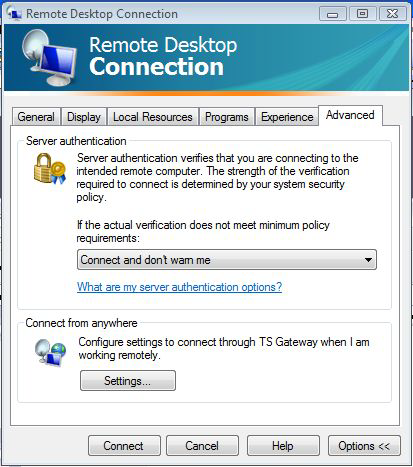
8. The last step is to create a
desktop shortcut for the connection. Return to the General tab and click Save
As. Select the Desktop as the location to save the shortcut, type in a name (ie
Mortgage Quest) and click Save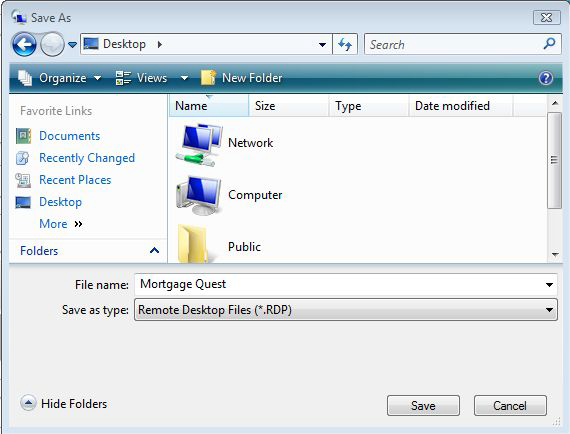
9. A remote desktop connection
icon is now available on the Desktop. Double click, and enter your password when
prompted to login. For subsequent logins to the WebDesk, repeat this step
only.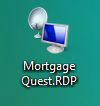
10. Before printing on the WebDesk, you will need to install the UniPrint Client software. After installing the UniPrint Client, launch the remote connection, and it will be ready to print.
Click Next above or select a topic on the left